
Table of Contents
Learning how to apply press on nails is the fastest way to get a salon-style manicure at home without the salon price, the appointment, or the two hours in a chair. Press-on nails are pre-shaped artificial nail tips that you stick onto your own nails with glue or adhesive tabs, a few minutes per hand, until you have the length, shape and design you want. They are the middle ground between bare nails and a full salon set: more polished than polish alone, far cheaper and quicker than acrylics or a gel appointment.
This guide explains exactly what press-on nails are, what you need before you start, and how to apply press on nails in seven simple steps. You will also find the glue-versus-tabs decision, how long a set really lasts, how to make it last longer, and how to take press-ons off safely without peeling layers off your own nails. No experience is needed — but do read the safety notes before your first try, because the glue is strong and your natural nails deserve care.
One distinction first: this is an application guide, not a design list. If you want design inspiration for the season, our nail design posts cover Halloween, Christmas, Thanksgiving and November looks — this guide is about the skill itself: prep, sizing, sticking, wearing and removing, so whichever design you choose actually stays on.
What Are Press-On Nails?
Press-on nails — also called fake nails, glue-on nails or false nail tips — are pre-shaped, pre-finished nail tips made from ABS plastic or soft gel. Instead of building length on your nail with liquid and powder at a salon, you buy the finished shape and attach it. Most kits include a range of sizes, a file, a cuticle stick, adhesive tabs, and sometimes a small tube of nail glue. A full set usually takes 10 to 15 minutes at home once you have practised, and lasts from a day to a few weeks, depending on the adhesive you use.
The difference from a salon manicure is time and cost. A salon set of acrylics or gel extensions takes an hour or more plus the appointment and the price that goes with it. A press-on set takes about 10 minutes at your own table and costs a fraction of the salon price. The difference from regular polish is durability and finish: press-ons give you real length and a perfectly shaped tip that polish alone cannot, and the design is already finished — no drying time, no smudging, no curing lamp.
There are two main materials you will see in shops. ABS plastic press-ons are the classic kind: rigid, affordable, and available in every shape and design. Soft gel press-ons are newer and more flexible: they feel lighter, bend slightly with your natural nail, and many wearers find them more comfortable for longer wear. Both attach the same way, and both last about as long — the adhesive and the prep matter far more than the material. Shapes run from short oval and squoval for everyday wear, through almond and coffin for a longer look, to stiletto for drama. Lengths are usually labelled short, medium and long, and most kits include 24 to 30 tips in mixed sizes so you can find your fit.
Why are press-ons everywhere in 2026? The new generation is nothing like the drugstore press-ons of a decade ago. Tips now ship with hand-filed edges, custom sizing, and adhesives that hold for two weeks, and the designs — chrome, tortoiseshell, velvet, French, minimalist — look genuinely salon-made. Choosing a shape is part of how to apply press on nails well: short lengths suit beginners and everyday wear, while long coffin or stiletto shapes suit occasions. This guide on how to apply press on nails follows the steps that nail guides agree on, so your first set looks good, stays on, and comes off safely.
How to Apply Press On Nails: What You Need First
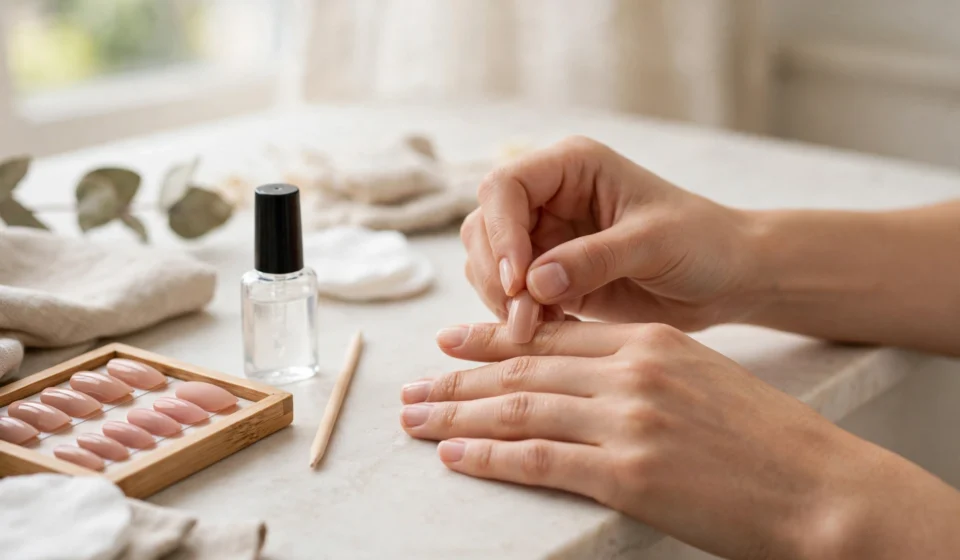
Before you learn how to apply press on nails, gather everything within arm’s reach. Stopping halfway to hunt for a file while glue dries on your nails is how sets go wrong. You will need: a set of press-on nails in mixed sizes, nail glue or adhesive tabs (whichever your kit uses — most kits include tabs, and glue is often sold separately), a nail file and buffer, a cuticle stick or orangewood stick, an alcohol wipe or isopropyl alcohol, a small towel, and cuticle oil for aftercare. A nail clipper helps too, for trimming your natural nails short first.
Prep is the step beginners skip — and it is the number one reason press-ons pop off early. Oil on the nail plate is the main cause of poor adhesion, according to every nail guide we checked. Your natural nails must be clean, dry and oil-free before anything sticks to them. That means washing your hands with an oil-free soap, drying them fully, and waiting a while before you start — nails take on water and expand slightly when wet, so apply when your hands have been dry for a while, not straight out of the shower.
Plan your sizes before you open the glue. Lay out your press-ons on the table in the order you will use them: one tip for each finger, thumb to pinky on both hands. Hold each tip against your natural nail to check the fit — it should cover your nail edge to edge, sidewall to sidewall, without touching the skin or the cuticle. Between two sizes, size down and gently file the sidewalls to fit, rather than squeezing on a tip that is too wide. Sizing is the step most people rush, and it is the step that matters most: a tip that is too big or too small will pop off far sooner than a well-fitted one.
One safety step matters more than the rest: patch test the glue. If you have never used a nail glue before, or you have sensitive skin, test a tiny amount on the skin of your inner arm at least 24 hours before you apply a full set, and do not use the product if the area becomes red, itchy or swollen. Nail glue is usually a cyanoacrylate adhesive — the same family as super glue — and a small number of people react to it. If you have a nail infection, a damaged nail bed, or a recent nail injury, skip press-ons and let the nail heal first.
How to Apply Press On Nails in 7 Best Steps
Here is the full method for how to apply press on nails, in order. Your first set will take about 30 minutes — that is normal. By your third set, most people are done in about 10 minutes. Work in good light, keep your hands dry, and do one hand completely before starting the other so you can match the shape.
Step 1: Trim and shape your natural nails
Start with short natural nails. Use a clipper and a file to trim your nails so they are short enough that they do not peek out from behind the press-ons. File the free edge smooth and shape it to roughly match the press-on — a short, slightly rounded edge works for most shapes. Do not cut your nails very short or into the corners; just short enough to sit neatly underneath the tip.
Step 2: Push back your cuticles
Using a cuticle stick, gently push your cuticles back as far as they will comfortably go. Do not cut the cuticle — the living cuticle protects the nail and the surrounding skin from infection, and cutting it creates an opening for bacteria. Pushing it back does two things: it exposes more of the nail plate for the adhesive to grip, and it helps you find the right size for each tip, because the tip should sit close to the cuticle without touching it.
Step 3: Buff lightly and dehydrate
Lightly buff the surface of each natural nail with a soft buffer to remove the shine and create a slightly textured surface for the adhesive to grip. There is no need for heavy filing — just enough to take the gloss off. Aggressive filing thins the nail and does not help adhesion. Then wipe each nail with an alcohol wipe or a cotton pad with isopropyl alcohol to remove every trace of oil and residue, and let the nails dry completely. Clean, dry nails are the whole secret of a set that lasts: leftover oil is a future pop-off.
Step 4: Size and lay out every tip
Before any adhesive touches a nail, lay out all ten tips in order on the table — thumb to pinky, left hand then right hand. Double-check each one against its finger: edge to edge, no skin contact, no gap at the sides. If a tip is slightly too wide, file its sidewalls a little at a time until it fits. If a tip is too narrow, try the next size up. Never force an oversized tip on and never settle for a tip that leaves your natural nail showing at the sides. Getting this right now saves you a set that lifts on day two.
Step 5: Apply the adhesive
The first question in how to apply press on nails is which adhesive to use — glue or tabs — and the full comparison is in the next section. For a first set, adhesive tabs are the friendlier choice: peel one side of the tab, press it onto the back of the press-on, peel the other side, and the tab is ready. For nail glue, apply a thin, even layer to your natural nail — a small drop in the centre, spread thinly across the nail bed, covering only about 30% of the nail at first, because it spreads as you press down. Too much glue does not hold better: it squeezes out at the sides, makes a mess, and can actually weaken the bond. Use a little, and add a tiny dot to the press-on as well if your glue’s instructions say so.
Step 6: Press at an angle and hold
Position the press-on at your cuticle line, placing it first at about a 45-degree angle with the base touching near the cuticle — not on the skin, but just in front of it. Then lower it toward the free edge, rolling it down to push out any trapped air, and press firmly. Hold it in place for 30 seconds — count it out, because most people hold for five seconds and wonder why it lifts. GlossyWay’s guide recommends 60 to 90 seconds for glue sets, and that longer hold is worth it for a first set. Press through the centre, the tip and the sides to eliminate air pockets. Do not wiggle or reposition the tip while the adhesive is setting — glue cannot be repositioned once it starts to set, so check the alignment before you press, not after.
Step 7: Shape, clean up, and let them set
Once all ten nails are on, file the tips gently to your preferred length and shape if needed — file in one direction, not back and forth, to avoid splitting the tip. Wipe away any excess glue immediately with a cuticle stick or a cotton bud dipped in a little remover; once glue dries on the skin it is a project to remove. Apply cuticle oil around — not underneath — the nail edges. Then keep your hands out of water for at least 1 to 2 hours so the bond can fully cure. The ideal time to apply is in the evening, a few hours before bed, so the set cures overnight undisturbed. Now you know how to apply press on nails from start to finish — and the next time, the same seven steps will feel twice as fast.
Nail Glue vs Adhesive Tabs: Which Should You Choose?
Glue and tabs are not enemies; they are two different tools for different wear goals. The right choice depends on how long you plan to wear the set, whether you want to reuse it, and how your nails handle removal.
| Factor | Nail Glue | Adhesive Tabs |
|---|---|---|
| Typical wear | 1–2 weeks (some brands claim up to 3–4 weeks) | 1–3 days (some quality tabs up to 3–7 days) |
| Best for | Vacations, busy weeks, events you want to last | Weekends, one event, trying a new design |
| Removal | Soak needed (warm water or acetone) | Peel or wiggle off, no soak needed |
| Reuse | Harder — glue residue must be cleaned off | Excellent — tips stay intact |
| Damage risk | Low if removed properly; higher if pried off | Near zero |
| Mess | More — excess glue needs wiping | None |
Nail glue is the better choice when your priority is longer wear. It creates a chemical bond that holds through daily life, and with good prep many people report 7 to 14 days of solid wear, with some sets pushing to 3 weeks before growth or lifting makes removal necessary. The trade-off is removal: glue needs a proper soak, and the press-ons may not be reusable afterward without careful cleaning. Glue dots sit in the middle at about 3 to 5 days with less mess than liquid glue.
Adhesive tabs are the better choice when you want flexibility. They are pressure-sensitive pads — a thin cushion of grip rather than a chemical bond — so they peel off cleanly and the set can be worn again immediately. Tabs are also the safer choice for beginners and for flat or wide nail beds, where glue sometimes cannot seal the side edges but a tab conforms. Keep the tab about 1mm away from your cuticle: if it touches skin, it lifts, and that gap is exactly why press-ons pop off or catch your hair.
There is also a hybrid method that nail communities swear by for 2-plus weeks of hold with reuse: apply a sticky tab to your clean natural nail first, peel off the backing, then add a tiny dot of brush-on glue on top of the tab before pressing the tip on. It combines the tab’s cushion with the glue’s grip. It takes more practice, so try it after your first plain-tab or plain-glue set, not before. Whichever adhesive you pick, how to apply press on nails stays the same: prep, size, thin adhesive, press and hold. For the full wear-time breakdown, see the Joyee Nails guide to how long press-on nails last and the GlossyWay step-by-step application guide.
How to Apply Press On Nails and Make Them Last Longer
How long a set lasts depends mostly on the adhesive and the prep, not on the nails themselves. With adhesive tabs, expect 1 to 3 days — some quality tabs reach 3 to 7 days. With nail glue, expect 1 to 2 weeks, and some brands claim up to 3 to 4 weeks with perfect prep and minimal water exposure. Different sources give different numbers because they test different adhesives and routines, so treat any single number with care: the honest range is a few days on tabs and one to two weeks on glue. Once you know how to apply press on nails properly, aftercare is what decides which end of that range you get.
Water is the main enemy in the first hours. Avoid water for 1 to 2 hours after application, and apply in the evening so the bond cures overnight. That first dry window is the most overlooked part of how to apply press on nails for long wear. After that, you can wash your hands normally, but wear gloves for dishes, cleaning and long soaks — prolonged hot water softens any adhesive. Swimming and saunas shorten wear time for every method, so if a pool day is coming, plan your set around it rather than fighting it.
Stop using your nails as tools. Opening cans, peeling stickers, scraping labels and typing with the very tips all lever the press-on away from the nail and start a lift at the edge. Use the pads of your fingers instead, and keep a nail file in your bag: if a corner lifts slightly, file it smooth rather than picking at it. Picking at a lifting edge is the fastest way to turn a small lift into a lost nail — and a torn natural nail underneath.
Cuticle oil helps, applied the right way: a drop around the edges each evening keeps the surrounding skin healthy and the seal flexible, but never push oil underneath a lifting tip, because oil dissolves adhesive. If one nail pops off early, do not glue it back over old adhesive — clean the tip and your natural nail fully, then reapply fresh adhesive. And never leave a set on indefinitely: trapped moisture underneath a long-worn set can leave the natural nail discoloured, so most guides suggest removing a glue set after about two weeks even if it still looks fine.
How to Remove Press-On Nails Safely
Knowing how to apply press on nails is only half the skill — removal is where most damage happens, and it is almost always avoidable. Never pull, peel or force a press-on off dry. Dry removal takes layers of your own natural nail with the tip, and it can cause onycholysis — the nail lifting from the bed — which leaves the nail exposed to infection and takes weeks to grow out.
For adhesive tabs, the removal is gentle: soak your fingertips in warm, soapy water for 5 to 10 minutes to soften the adhesive, then wiggle each nail slowly from side to side until it loosens. If it does not budge, soak a few minutes longer rather than forcing it. The nails should come off clean, with the tips fully intact and ready to wear again.
For nail glue, removal takes more patience. Soak your nails in warm, soapy water with a little cuticle oil for 15 to 20 minutes, then use a cuticle stick or orangewood stick to gently lift the edge and slowly work the press-on off, starting from the sides rather than prying from one corner. For a faster method, soak a cotton pad in acetone-based remover, press it against the tip, wrap it in foil for 10 to 20 minutes, then ease the nail off the same way. If a tip resists, soak again — a second round of remover is always better than force. Support your natural nail with a fingertip while you lift, so nothing tugs. The full method is covered in the Joyee Nails safe removal guide.
After removal, cleanse your nails thoroughly, remove any residue, and apply cuticle oil to rehydrate the nail and surrounding skin. If your nails feel thin, rough or look peeled, give them 3 to 7 days of cuticle oil and a strengthener before your next set. If you want to reuse your press-ons, clean them before storing: strip off old adhesive completely, rinse and dry each tip, and store them in their tray in order so they keep their shape. With careful removal and storage, most press-on sets can be worn 3 to 5 times or more — tab-applied sets reuse best, since the tips stay fully intact.
Stop and seek professional advice if you notice persistent pain, swelling, redness, or a nail that has lifted from the bed and does not settle after removal. Those are signs to get checked, not to push through with another set. For everyday nail health between sets, our winter nail care routine covers how to stop breakage and keep nails strong.
Common Mistakes When You Apply Press On Nails
Most bad first sets — and most people learning how to apply press on nails make them — come from the same few errors. The first is skipping prep: applying press-ons over oily nails or leftover polish. Oil is the number one cause of poor adhesion, so a clean, dry, oil-free nail plate is not optional. The second is wrong sizing: a tip that is too wide lifts at the edges, and a tip that is too narrow leaves your natural nail showing and catches on everything. Size first, file to fit, and never settle.
The third mistake is using too much glue. A thick layer does not hold better — it squeezes out at the sides, makes a mess, and can actually weaken the bond. Thin layers hold far better. The fourth is trapping air: pressing the tip straight down instead of rolling it from the cuticle at 45 degrees leaves air pockets underneath, and air pockets become lifts within a day. The fifth is water too soon: washing dishes or showering within an hour of application softens the bond before it has cured.
The sixth mistake is the one that costs natural nails: pulling press-ons off dry. Always soak and lift gently with a stick. The seventh is wearing a set too long — past the adhesive’s designed wear time, or while tips are lifting and trapping moisture underneath. And the eighth is forgetting the patch test: if you have never used a nail glue, test it first, because a reaction across ten nails is far worse than a reaction on one small patch of skin. If you remember one thing from this guide on how to apply press on nails, let it be this: prep, correct size, thin adhesive — those three steps decide almost everything.
Frequently Asked Questions
How long do press-on nails last?
It depends on the adhesive. With adhesive tabs, expect 1 to 3 days — some quality tabs reach 3 to 7 days. With nail glue, expect 1 to 2 weeks, and some brands claim up to 3 to 4 weeks with perfect prep. Glue dots sit in the middle at about 3 to 5 days. Prep quality, sizing and daily care decide where in the range you land.
Are press-on nails better than salon nails?
For most people, yes — if you want a beautiful manicure without the appointment and the price. Press-ons give you a salon-style finish in about 10 minutes at home for a fraction of the cost, and you can change designs whenever you like. Salon nails win on longevity and on complex work like sculpted extensions: a salon acrylic set can last 3 to 4 weeks with fills, while press-ons top out around 2 weeks on glue. If you want a long, sculpted shape that lasts a month, go to a salon; if you want a gorgeous set this weekend, learning how to apply press on nails is worth the ten minutes. For a longevity comparison with another at-home system, see our Gel X nails longevity guide.
Can beginners apply press-on nails at home?
Yes — learning how to apply press on nails at home is very doable for beginners. Expect about 30 minutes of careful work on your first attempt, dropping to roughly 10 minutes by your third set as the routine becomes familiar. Start with adhesive tabs, pick a short length, and size every tip before you open the adhesive. Do a patch test first, and do not attempt a set if your nails are damaged or infected.
Can you shower or swim with press-on nails?
Showering is fine once the bond has cured — wait at least 1 to 2 hours after application, and keep showers short and warm rather than long and hot for the first day. Swimming, saunas and long baths shorten wear time for every adhesive, so plan around them: apply a fresh set after the pool day, not before it, and wear gloves for dishes and cleaning.
Do press-on nails damage your natural nails?
Not when they are applied and removed properly. Damage comes from two things: press-ons that are too tight or too heavy for your natural nails, and pulling them off dry. Use correctly sized, lightweight tips, do not overload one nail, and always remove by soaking. Let your natural nails rest for a few days between sets if they feel thin or look peeled.
Can you reuse press-on nails?
Yes — adhesive-tab sets reuse best, since the tips come off clean and stay fully intact. Clean off old adhesive, check each tip for damage, and store them in their original tray in order. Most sets can be worn 3 to 5 times or more with careful removal and storage. Glue-applied sets can also be reused, but you must clean the glue residue off the underside first, and aggressive scraping can thin or crack the tip.
Press-on nails are the rare trend that is both viral and genuinely useful: a salon look in 10 minutes, at home, for a fraction of salon prices. The whole skill is in three habits — a clean, dry, oil-free nail plate, a correctly sized tip, and a thin layer of adhesive pressed on at an angle and held for a full 30 seconds. Get those right, pick an adhesive that matches how long you want to wear the set, and remove it gently by soaking, and you will get the look the trend promises without the damage the rushed tutorials cause. For the full step-by-step from the brands, see the GreenWeddingShoes press-on nails guide and the GlossyWay application guide.