
Table of Contents
Quick Answer
If you want to know how to make highlighter last all day 2026, here is the short version: prep with a gripping primer, layer a cream or liquid highlighter underneath a powder highlighter in the same shade, press (never swipe) it onto the high points of your face, and lock it in with a fine mist of setting spray. That one layering trick — cream under powder, then spray — is what takes a glow from fading by lunch to still catching the light at dinner.
I learned this the hard way. For years my highlighter looked gorgeous in my bathroom mirror at 8 in the morning and completely invisible by the time I sat down for lunch. It was not the product’s fault, and it was not my skin’s fault either. It was the order I was doing things in — powder straight onto bare, moisturized skin, no grip underneath, no seal on top. Once I fixed the order, the same highlighter I already owned suddenly lasted twelve hours. Nothing in this guide requires buying a new palette. It is about technique, and technique is free.
Why Does Highlighter Fade So Fast?
Highlighter is the most fragile product in your whole routine, and that is not an accident. Think about what it actually is: tiny light-reflecting particles sitting on the very top layer of your makeup, on the highest points of your face — the exact spots that catch the most oil, the most sweat, and the most friction from your hands, your phone, and your scarf.
Three things kill it before noon. First, oil. Your skin produces sebum all day, and the T-zone and cheekbones are prime territory. Oil dissolves the binders that hold shimmer particles in place, so the glow literally slides off. Second, moisture. If you apply highlighter over a moisturizer or foundation that has not fully set, you are painting on a wet surface — nothing grips. Third, touch. Every time you rest your chin on your hand or press your phone to your cheek, you are wiping the product away.
The good news is that all three problems have the same fix: give the highlighter something to hold on to, and then seal it in. That is the whole philosophy behind this guide.
How to Make Highlighter Last All Day 2026: Prep Your Skin First
Every long-lasting makeup look starts before the makeup does. If you skip prep, no highlighter — no matter how expensive — will survive the day.
Start with a clean face. Wash with a gentle cleanser and pat dry; do not rub, because rubbing leaves the skin slightly irritated and uneven, and highlighter shows every bit of texture. Then moisturize, but here is the part most people get wrong: wait. Give your moisturizer a full two to three minutes to sink in. If your skin still feels damp or tacky when you reach for your foundation, your highlighter will sit on top of that wet layer and slide off within hours. Touch your cheek — if it feels dry to the touch, you are ready.
Next comes primer, and this is the step that changes everything. A primer is not optional if you want all-day wear. Choose one for your skin type: a hydrating, gripping primer if your skin runs dry, or a mattifying primer if you get oily by midday. Apply it only where you need it — a thin layer across the cheekbones, the bridge of the nose, and the brow bone, the exact places your highlighter will go. Press it in with your fingers and let it turn tacky for 30 to 60 seconds before you move on. That tacky surface is the grip your highlighter needs.
One more prep rule that sounds small but matters a lot: set your base before you highlight. If you wear foundation, let it set for a minute, then press a whisper of translucent powder into the areas that get oily — under the eyes, around the nose, the center of the forehead. Leave the cheekbones alone for now. A dry, set base gives powder highlighter something smooth to glide over instead of a wet patch it will cling to in blotches.
How to Make Highlighter Last All Day 2026: The 5-Step Method That Locks In Glow
This is the core of the whole guide. Five steps, in this exact order, and your highlighter will outlast your workday.
Step 1: Prime the high points
After your moisturizer has fully absorbed, press a pea-sized amount of primer onto your cheekbones, brow bones, and the bridge of your nose. Use your ring finger and press, do not rub. Wait 30 to 60 seconds until the primer feels tacky, not wet.
Step 2: Apply a cream or liquid highlighter first
Take a cream or liquid highlighter in a shade close to your skin’s undertone — champagne for fair skin, warm gold for medium skin, bronze or copper for deep skin — and dot it onto the tops of your cheekbones. Blend it out with a damp makeup sponge or your fingertip using small pressing motions. The cream layer is the glue. It melts into the skin and gives the powder something to bond with.
Step 3: Layer a powder highlighter in the same shade on top
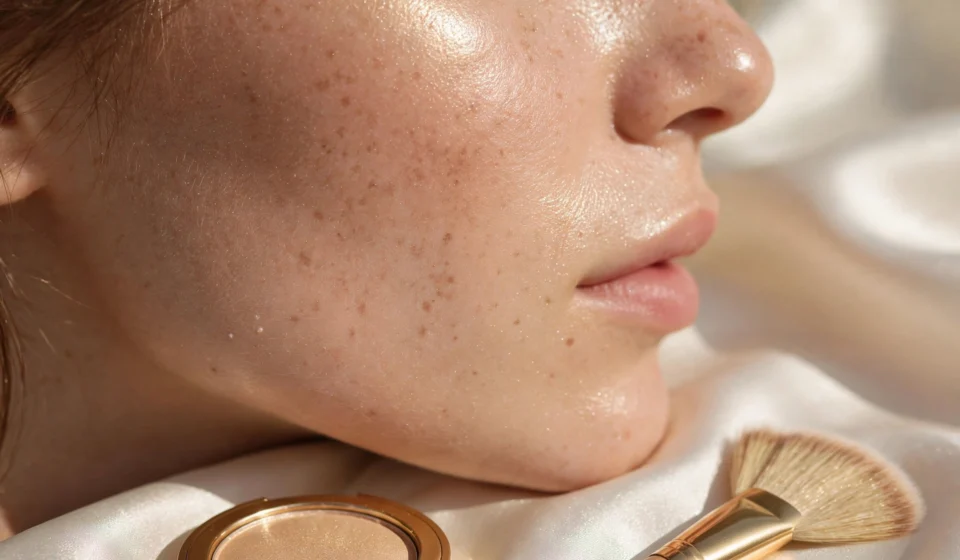
While the cream layer is still very slightly tacky, press a powder highlighter in a matching shade right on top of it with a small fan brush or a dense tapered brush. Press, do not sweep — sweeping drags the cream layer around and muddies the glow. This cream-under-powder sandwich is the single biggest longevity upgrade in this entire guide. Each layer locks the other one in, and together they last hours longer than either one alone.
Step 4: Set lightly — but only where it helps
Here is where most guides get it wrong. A heavy dusting of translucent powder over your highlighter will flatten the shine and make it look chalky. Instead, either skip powder on the highlight entirely, or use the tiniest amount — one gentle press of a fluffy brush with translucent powder just at the edges of the highlight, never the center. The center of the glow should stay untouched and dewy.
Step 5: Mist with setting spray and let it dry untouched
Hold a setting spray 8 to 10 inches from your face, close your eyes, and mist in an X and then a T pattern so the coverage is even. Choose a dewy-finish spray if you want the glow to stay luminous, or a long-wear spray if staying power matters more than shine. Then — and this is the hard part — do not touch your face until it is completely dry. The spray forms a thin, flexible film over the shimmer particles, and that film is what holds everything in place until evening.
Best Highlighter Formulas for All-Day Wear
Not every formula lasts the same length of time, and picking the right one for your skin type is half the battle. Here is how the main formulas compare.
| Formula | Best for skin type | Wear time | Finish | Longevity tip |
|---|---|---|---|---|
| Cream highlighter | Dry, normal | 8–10 hours | Dewy, skin-like | Layer powder on top to seal it |
| Liquid highlighter | Dry, mature | 8–12 hours | Lit-from-within glow | Mix a drop into foundation for all-over wear |
| Powder highlighter | Oily, combination | 6–8 hours alone | Bright, reflective | Always layer over cream for all-day wear |
| Baked highlighter | All skin types | 8–10 hours | Soft, buildable shimmer | Apply with a damp brush for extra intensity |
| Stick highlighter | Normal, combination | 7–9 hours | Quick, on-the-go glow | Press and blend fast — it sets quickly |
If you only buy one thing, make it a cream or liquid highlighter in your shade. Powders are beautiful, but on their own they are the first thing to fade. Cream and liquid formulas grip the skin, and when you seal them with powder, you get the best of both worlds: the staying power of cream and the brightness of powder.
For oily skin, the winning combination is a mattifying primer plus a baked or powder highlighter layered over a thin cream base — the primer controls the oil, the cream gives grip, and the powder gives the shine. For dry skin, skip heavy powder entirely and lean on liquid highlighter plus a dewy setting spray; powder is what makes dry skin look cakey by afternoon. For mature skin, cream and liquid formulas are your friends — they sit on the skin instead of settling into fine lines the way glittery powders can.
How to Make Highlighter Last All Day 2026 on Oily, Dry, and Combination Skin
Your skin type decides which parts of the method matter most, so here is the quick version for each one.
Oily skin: Your enemy is sebum, and it starts breaking highlighter down within a couple of hours. Use a mattifying primer on the high points, set your foundation with translucent powder before highlighting, and choose a baked or powder highlighter as your top layer. Carry blotting papers — not powder — for midday touch-ups, and blot around the highlight, never on it. One more trick: a long-wear setting spray with film-forming ingredients holds up far better on oily skin than a hydrating mist.
Dry skin: Your enemy is texture and flaking. Exfoliate gently once or twice a week so the highlighter has a smooth surface to sit on, moisturize well and wait for it to absorb fully, and lean on cream and liquid formulas. Use a hydrating primer, skip powder on the cheekbones, and finish with a dewy setting spray that melts everything together instead of drying it out.
Combination skin: Treat the zones differently. Mattifying primer and a light powder set on the T-zone; hydrating primer and cream highlighter on the cheeks. Layer cream under powder on the cheekbones only, and mist with a setting spray that is labelled long-wear rather than dewy or matte — the middle ground suits you best.
Sensitive skin: Keep it simple. Fragrance-free primer, a cream highlighter with minimal shimmer (large glitter particles irritate more easily), and a gentle setting spray. Patch-test any new product on your jawline the night before an important day, not the morning of it.
Mistakes That Kill Your Highlighter Before Noon
I have made every one of these, so you do not have to.
Applying highlighter over wet moisturizer or foundation. This is the number one mistake. Wet layers repel powder and dissolve cream. Always wait until each layer feels dry to the touch.
Using too much product. A thick stripe of highlighter looks dramatic at 8 a.m. and patchy by noon, because a heavy layer creases and flakes faster than a thin one. Two sheer layers always outlast one thick one.
Sweeping instead of pressing. Sweeping a brush across your cheekbone drags the product — and the layers underneath it — out of place. Press and tap. Your glow should be built, not painted on.
Setting the whole face with powder, including the highlight. Translucent powder absorbs oil, but it also absorbs shine. Powder the T-zone and leave the high points alone, or you will mattify the very glow you just built.
Touching your face all day. Your hands carry oil, and every touch transfers it straight onto your cheekbones. If you catch yourself resting your chin in your hand, that is where your highlighter went.
Skipping setting spray. It feels like an optional extra, but it is the seal on the whole routine. Without it, you are relying on the product alone. With it, you have a protective film doing the work for you.
How to Touch Up Highlighter Without Ruining Your Makeup
Even a perfect application fades a little by evening, especially after a long day, a workout, or a humid commute. The good news is that a touch-up takes thirty seconds if you do it right.
First, blot. Press a blotting paper gently onto the oily areas around the highlight — never rub, and never blot directly on top of the glow, or you will lift it off. If you do not have blotting papers, a single ply of clean tissue works in a pinch.
Second, reapply with a light hand. Tap a tiny amount of the same powder highlighter onto the tops of your cheekbones with a clean fingertip or a small brush. Press, do not sweep. Because the cream layer underneath is still there, the powder will grip again immediately.
Third, mist once more. One light pass of setting spray, held far from your face, re-seals the touch-up without disturbing the makeup underneath. Let it dry before you touch your face or put your phone to your cheek.
What not to do: do not pile on more cream highlighter over a faded powder layer midday — cream over powder slides around and turns patchy. And do not reapply with a wet sponge over set makeup; the dampness will lift your foundation in patches. Keep the touch-up dry, light, and quick.
Best Products and Shades for a Glow That Lasts
You do not need a luxury palette for this to work — drugstore highlighters layer just as well as high-end ones when the technique is right. What matters is the shade and the finish.
Pick your shade by undertone, not by trend. Champagne and pearl flatter fair skin without looking ashy. Warm gold and peachy champagne suit medium skin best. Bronze, copper, and rose gold look stunning on deep skin — silver or icy shades can turn grey on deeper tones. If you are unsure, hold the highlighter next to your face in natural daylight: the right shade disappears into your skin and just leaves light behind. The wrong shade sits on top of it like a stripe.
Finish matters too. For daytime, choose a finely milled shimmer — the particles should be so small you cannot see individual sparkles, just a smooth glow. Big glitter particles catch the light beautifully in photos but emphasize texture in real life and fade in patches. Save the chunky glitter for parties. For evenings and events, a duochrome or holographic highlighter layered over your usual champagne shade gives you that color-shifting glow that turns heads when you move.
And one honest note: if your highlighter is more than two years old, or it smells off, replace it. Old cream formulas dry out and stop gripping, and old powders go patchy. Fresh product performs better, full stop.
Frequently Asked Questions About Making Highlighter Last All Day
Can I use setting spray to make highlighter last longer?
Yes — setting spray is one of the most effective tools for the job. Mist it over your finished makeup from 8 to 10 inches away and let it dry completely without touching your face. A long-wear or dewy spray forms a thin film that locks shimmer particles in place and can add several hours of wear.
Should I apply highlighter before or after setting spray?
Apply highlighter first, then mist setting spray over the top as the final step. Spraying before highlighter leaves the skin damp, and powder applied over damp skin clumps and fades fast. The correct order is: primer, foundation, cream highlighter, powder highlighter, then setting spray.
Does powder highlighter or cream highlighter last longer?
Cream and liquid highlighters last longer on their own because they grip the skin, usually 8 to 12 hours versus 6 to 8 for powder alone. But the longest-lasting combination is both: cream underneath, powder on top. That layering method beats either formula used alone.
How do I stop highlighter from fading on oily skin?
Use a mattifying primer on the high points, set your base with translucent powder before highlighting, layer cream under powder, and finish with a long-wear setting spray. Carry blotting papers and blot around — never on — the highlight during the day.
Can I wear highlighter every day without damaging my skin?
Yes, as long as you remove it properly at night. Double-cleanse — an oil-based cleanser first, then a gentle water-based one — so no shimmer particles stay trapped in your pores overnight. Never sleep in highlighter, and exfoliate gently once or twice a week to keep the surface smooth.
The Bottom Line
Learning how to make highlighter last all day 2026 is not about finding one magic product. It is about the order: prep with primer, layer cream under powder, press instead of sweeping, and seal it all with setting spray. Do those four things and the glow you see in the mirror at 8 in the morning will still be there when you get home at night.
Start with what you already own. Try the 5-step method tomorrow morning, give the setting spray time to dry, and keep your hands off your face until lunch. I think you will be surprised by how much longer your highlighter lasts — I certainly was. And if you are still learning where highlighter goes in the first place, read How to Apply Highlighter Like a Pro (Glow in 5 Minutes) first, then come back and layer this routine on top of it. Your glow will thank you. For the rest of the series, see how to make foundation last all day 2026, how to make eyeshadow last all day 2026, and how to make eyebrows last all day 2026 — and for placement ideas, see the Rude Cosmetics guide to where to apply highlighter makeup.