
If you enjoy doing your nails at home, a complete polygel starter kit can make the process more convenient by putting the basic tools and products in one package. Paddie Polygel Nail Kit is one of the DIY nail systems that has attracted attention from people looking for an alternative to regular salon appointments.
But is the Paddie kit suitable for beginners? What comes inside the box? How long can the nails last? And what do customers actually say about the product?
In this Paddie Polygel Nail Kit review, we’ll look at the kit’s features, included tools, application process, expected wear time, customer feedback, advantages, drawbacks, and important things to consider before buying.
Editor’s note: Product specifications, prices, guarantees, and performance claims can change. The information below reflects the product information and reviews available at the time of writing.
What Is the Paddie Polygel Nail Kit?
Paddie markets its Polygel Starter Kit as an at-home nail extension system designed for beginners and DIY nail enthusiasts.
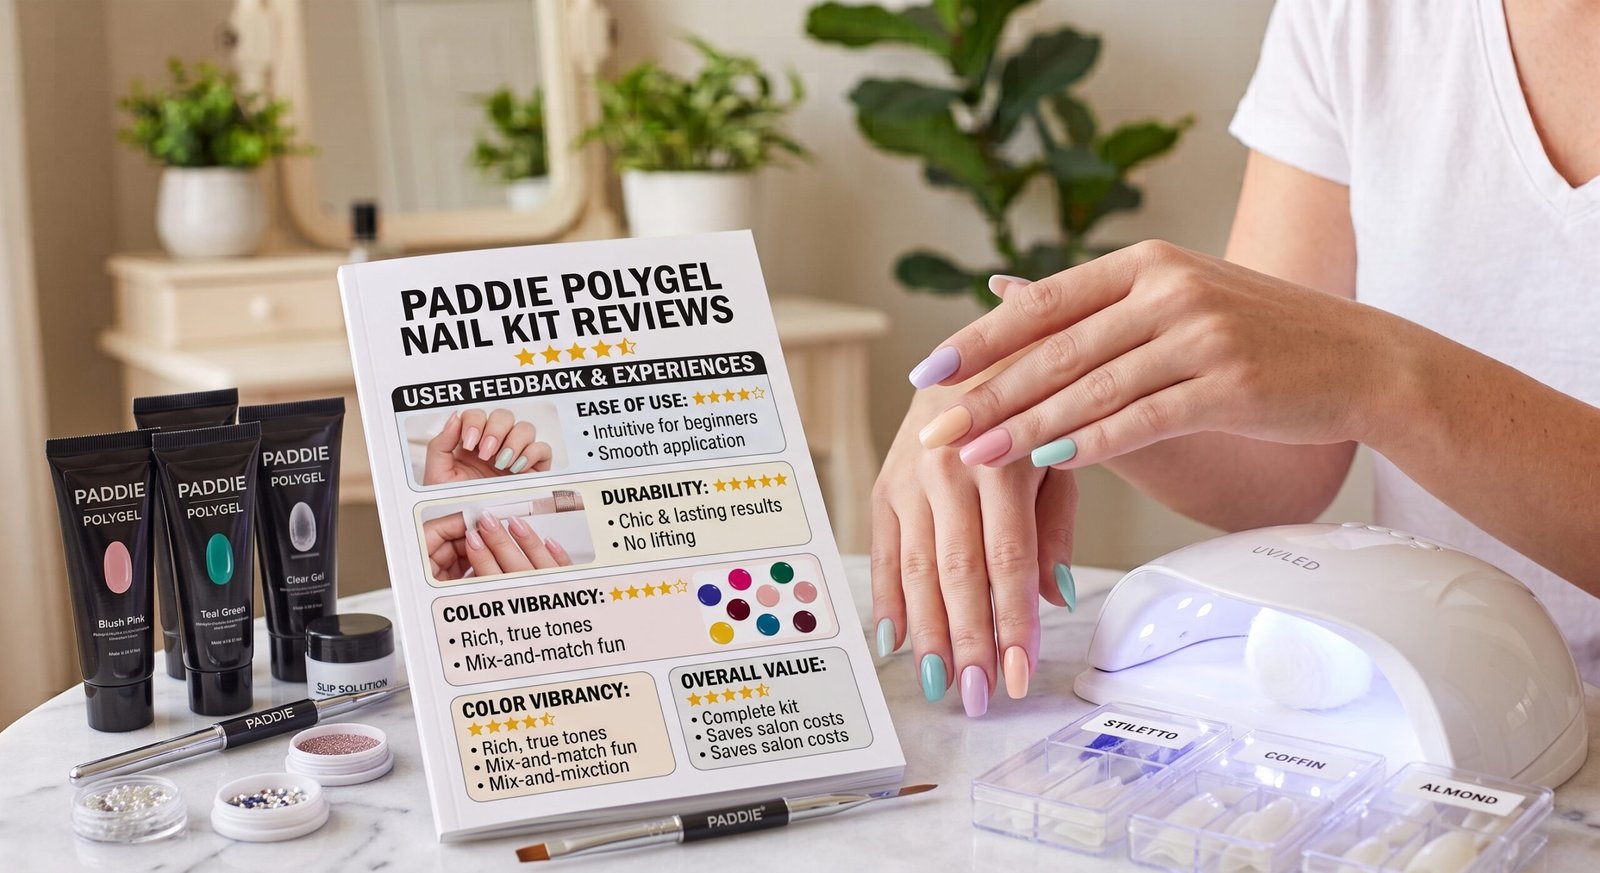
According to Paddie’s current product page, the starter kit includes a 15 g / 0.5 oz polygel tube, nail clip, dual-ended brush and cuticle pusher, 20 dual-form nail tips, slip solution, base coat, top coat, mini nail file, wooden stick, alcohol wipe, and a mini UV lamp.
The idea is straightforward: prepare the natural nail, place polygel into a suitable form, shape it, cure it under the included lamp, and finish the nails with filing and top coat.
For someone starting with polygel, having several of these basic items together can be more convenient than purchasing every component separately.
Paddie Polygel Nail Kit: What’s Included?
The exact contents can vary depending on the kit or product version, so checking the current product listing before purchasing is important.
The Paddie starter kit currently advertises the following items:
| Item | Purpose |
|---|---|
| Polygel | Used to build and extend the nail |
| Dual-form tips | Help create the nail’s shape and length |
| Brush/tool | Helps shape and spread the polygel |
| Slip solution | Helps with manipulating the polygel |
| Base coat | Used during preparation |
| Top coat | Provides the finishing layer |
| UV lamp | Used to cure the gel system |
| Nail file | Helps refine the finished shape |
| Cuticle pusher | Helps with nail preparation |
| Wooden stick | Useful for detailed preparation and cleanup |
| Alcohol wipe | Helps clean the nail surface |
Paddie’s product listing also advertises multiple polygel color options, including shades such as clear, nude, pink, white, black, red, blue, purple, and other colors.
How Does Paddie Polygel Work?
Polygel is designed to combine characteristics associated with gel and acrylic-style nail enhancements.
Unlike traditional liquid-and-powder acrylic systems, polygel has a thicker consistency that can be shaped before curing.
The general Paddie application process involves:
- Preparing the natural nails
- Applying base coat
- Selecting the appropriate dual form
- Applying and shaping the polygel
- Placing the form
- Curing under the UV light
- Removing the form
- Filing and shaping the nail
- Applying top coat
- Curing the finished surface
Paddie says its application can take around 15 minutes for a complete set and describes individual nail application as taking approximately 1–2 minutes. These are manufacturer claims and actual application time can be considerably longer for beginners.
How Long Does Paddie Polygel Last?
According to Paddie’s product information, the polygel system can last around 2–3 weeks with proper preparation and application. Its FAQ specifically states that proper nail preparation and use of the base and top coat can result in nails lasting 2+ weeks.
Actual wear time depends on several factors, including:
- Natural nail condition
- Nail preparation
- Application technique
- Product thickness
- Curing
- Daily activities
- Exposure to water and chemicals
- Nail length
- Aftercare
A beginner may also need some practice before achieving the same durability as an experienced nail technician.
Paddie Polygel Nail Kit Reviews: What Customers Say
Customer experiences with Paddie appear to be mixed rather than universally positive.
On Trustpilot, the Paddie Nails profile currently displays a 2.1/5 TrustScore based on 49 reviews in the search result available for this review. The page includes both negative and positive experiences.
For example, one reviewer described the instructions and tutorial videos as helpful but said there was a learning curve involved in getting the correct thickness and professional-looking results. The reviewer later updated their feedback positively after gaining more experience.
Other Trustpilot reviewers have raised complaints concerning product quality, delivery, colors, or customer-service and subscription-related experiences. These are individual customer reports and should not automatically be treated as evidence that every customer will have the same experience.
There are also independent video reviews. For example, a 2024 YouTube video by Anne Elizabeth documents testing a Paddie polygel kit and includes sections covering unboxing, preparation, application, and top coat. The video description identifies the collaboration as sponsored, so it is useful as an example of the application process but should be considered in that context.
Paddie Polygel Nail Kit Pros
Based on the advertised features and available customer information, there are several aspects that may appeal to DIY nail users.
1. Beginner-Oriented System
The kit is marketed specifically toward people who want to create polygel nails at home.
The inclusion of forms, tools, base coat, top coat, and a curing lamp makes the starter setup relatively straightforward.
2. Multiple Nail Shapes
The dual-form approach allows users to create different lengths and styles.
Depending on the available forms and your shaping technique, you can experiment with looks such as:
- Square nails
- Tapered square nails
- Almond nails
- Coffin-style nails
- Longer statement nails
3. Variety of Colors
Paddie’s product listing currently presents a broad range of polygel colors. This gives DIY users more flexibility than a kit containing only one neutral shade.
4. At-Home Convenience
One of the main attractions of any DIY nail kit is convenience.
Instead of scheduling a salon appointment for every set, users can practice and create their own designs at home.
5. Reusable Tools
Some components of a starter kit, such as the brush, nail tools, file, and lamp, can potentially be used across multiple applications, depending on their condition and the product instructions.
Paddie Polygel Nail Kit Cons
A review should also consider the potential disadvantages.
1. There Is a Learning Curve
Polygel can look simple in promotional videos, but controlling the amount of product, shaping the cuticle area, selecting the right form, and creating consistent thickness takes practice.
Customer feedback on Trustpilot also includes an example of a user describing the learning curve involved in getting the thickness and professional appearance right.
2. Results Depend on Nail Preparation
A starter kit cannot compensate for poor preparation.
If the natural nail is not appropriately prepared, the product may lift sooner or produce an uneven finish.
3. Application Can Take Longer for Beginners
Although Paddie advertises a 15-minute application experience, beginners may need considerably more time while learning the technique.
It is better to focus on correct preparation and application rather than trying to finish as quickly as possible.
4. Customer Experiences Are Mixed
Online reviews include both positive and negative experiences.
That means shoppers should look beyond individual testimonials and consider the overall product contents, current policies, price, shipping, and their own expectations.
5. Product Claims Are Manufacturer Claims
Paddie advertises benefits such as long wear, lightweight nails, and strength compared with other nail systems. Those statements appear on Paddie’s own product pages and should be understood as marketing claims rather than independent laboratory conclusions.
Is Paddie Polygel Nail Kit Good for Beginners?
The kit is clearly marketed toward beginners, and its all-in-one approach can make the initial setup easier.
However, beginner-friendly does not mean completely effortless.
New users still need to learn:
- Nail preparation
- Form selection
- Product control
- Proper curing
- Filing and shaping
- Cuticle-area application
- Safe removal
Watching an instructional tutorial before attempting a complete set can help you understand the process.
How to Apply Paddie Polygel Nails
A general application sequence is:
Step 1: Prepare Your Nails
Clean the natural nails and remove old polish or enhancement material.
Gently prepare the cuticle area and nail surface according to the product instructions.
Step 2: Apply Base Coat
Apply the recommended base coat carefully.
Avoid getting gel products on the surrounding skin.
Step 3: Choose the Correct Form
Select a dual form that fits the natural nail without excessive pressure or gaps.
Step 4: Add Polygel
Place a suitable amount of polygel into the form.
Use the included brush to distribute and shape the product.
Step 5: Position the Form
Carefully place the form over the natural nail.
Make sure excess product does not flood onto the skin.
Step 6: Cure the Nail
Paddie instructs users to cure the polygel with its UV light. Follow the specific curing time and lamp instructions supplied with the product you are using.
Step 7: Remove the Form
Once the product is appropriately cured, remove the dual form.
Step 8: File and Shape
Refine the edges and shape of the nail.
Step 9: Apply Top Coat
Finish the nail with the recommended top coat and cure according to the instructions.
How to Make Paddie Polygel Nails Last Longer
Proper aftercare can make a noticeable difference.
Avoid Using Nails as Tools
Do not use your extensions to open packages, scrape surfaces, or pry objects.
Wear Gloves During Cleaning
Household cleaning products and prolonged water exposure can be hard on manicures.
Don’t Pick at Lifting Product
If the polygel starts lifting, avoid pulling or peeling it from the natural nail.
Keep the Cuticle Area Maintained
Regularly moisturize the surrounding skin and keep the nail area clean.
Remove the Product Correctly
Never forcibly pull off artificial nail enhancements. Follow the manufacturer’s removal instructions or have the product professionally removed.
Paddie Polygel vs. Traditional Acrylic Nails
Polygel and acrylic are different enhancement systems.
| Feature | Paddie Polygel | Traditional Acrylic |
|---|---|---|
| Consistency | Thick gel-like material | Liquid and powder |
| Curing | UV/LED curing system | Generally air cures |
| Application | Can be shaped before curing | Sculpted while setting |
| DIY learning curve | Requires practice | Requires practice |
| Available shapes | Multiple | Multiple |
| At-home use | Designed for DIY users | Possible but more technique-sensitive |
The right choice depends on your preferred application method, desired finish, experience level, and nail routine.
Does Paddie Polygel Need a UV Lamp?
The Paddie system uses UV curing as part of its application process, and the starter kit is advertised with a UV light.
Always use the lamp and curing procedure specified for the particular gel product. Inadequate curing can affect the finished product and may increase the risk of skin exposure to uncured gel.
Paddie Polygel Nail Kit Safety Tips
DIY gel products require careful application.
Keep uncured gel away from the surrounding skin and cuticles. If gel repeatedly contacts the skin, it can increase the risk of skin irritation or sensitization.
Other useful precautions include:
- Follow the product instructions.
- Use the recommended curing lamp.
- Do not apply product over damaged or infected nails.
- Avoid aggressive filing of the natural nail.
- Never peel off artificial enhancements.
- Stop using the product if you develop irritation or an unusual reaction.
Frequently Asked Questions
Is Paddie Polygel Nail Kit worth trying?
Whether it suits you depends on your experience, budget, expectations, and willingness to learn the application technique. The kit is designed for DIY use, but online customer experiences are mixed, so shoppers should review current product details and policies before purchasing.
How long does Paddie polygel last?
Paddie states that its polygel can last 2+ weeks with appropriate nail preparation and use of the base and top coat, while its product marketing also describes a 2–3 week wear period. Actual results vary.
Is Paddie Polygel easy to use?
The system is marketed toward beginners, but creating a neat and durable set still requires practice. Product quantity, form placement, shaping, and curing all affect the final result.
Does Paddie Polygel need a lamp?
Yes. Paddie’s starter kit is designed around UV curing and includes a UV light according to the current product listing.
Can beginners use Paddie Polygel?
Yes, the product is marketed for beginners. However, beginners should expect a learning period rather than assuming their first set will look identical to a salon manicure.
What comes with the Paddie Polygel Nail Kit?
The current starter-kit listing includes polygel, dual-form tips, a brush/tool, slip solution, base and top coats, a UV lamp, nail file, nail tools, and other accessories. Exact contents can vary by product version.
How do you remove Paddie Polygel?
Paddie currently describes a home-removal method involving warm soapy water and olive oil, followed by gentle removal, and also promotes a separate remover kit. Because removal instructions can change, users should follow the current instructions for their specific product.
Final Verdict: What Should You Know Before Buying?
Paddie Polygel Nail Kit is positioned as an all-in-one DIY system for people who want to create polygel extensions at home. Its advertised package includes many of the basic tools needed for application, and the company provides tutorials and instructions for beginners.
At the same time, expectations matter. Polygel application involves a learning curve, and available customer reviews include both positive experiences and complaints.
If you are considering the kit, check the current price, included accessories, shipping terms, return policy, and recent customer feedback before purchasing. Most importantly, learn the correct preparation, curing, and removal techniques so that your DIY manicure looks good while minimizing unnecessary stress on your natural nails.