

Table of Contents
Learning how to apply concealer for beginners 2026 is the fastest way to make your whole makeup routine look better — without buying a single new product. Concealer is the one item that can brighten tired eyes, hide a surprise breakout, and even out redness in under two minutes. Yet it is also the product beginners get wrong most often: the wrong shade, too much product, or the wrong order can leave you looking cakey instead of flawless.
This guide to how to apply concealer for beginners 2026 walks you through everything in order: what concealer actually does, how to pick your shade and undertone, which formula suits your skin, which tool to blend with, and then the exact 7-step routine the pros use — followed by creasing fixes, the mistakes to avoid, and answers to the six questions beginners ask most. No jargon, no expensive kit required, and every step works with a single concealer and one blending tool.
What Concealer Does — and What It Cannot Do
Concealer carries more pigment than foundation, so it covers what foundation leaves visible: dark circles, blemishes, scars, and redness. Foundation evens out your overall skin tone; concealer is the targeted fix that goes on top of it, exactly where you need extra coverage. That division of labour is the whole secret — if you try to make concealer do foundation’s job by spreading it across your whole face, it will look heavy, settle into fine lines, and wear off unevenly.
Under the eyes, a thin liquid or light cream concealer brightens darkness and makes you look awake, even after a short night. On a blemish, a denser cream or stick covers the spot without needing a thick layer of foundation over the entire face. Around the nose and mouth, concealer neutralises redness that foundation alone often cannot fully hide. It can also add dimension: a shade slightly lighter than your skin under the eyes and down the centre of the nose creates a subtle lifted effect, while a shade matched exactly to your skin disappears completely on spots.
What concealer cannot do is just as important. It cannot fix texture — it will not smooth over flaky skin, large pores, or raised blemishes, and putting more product on a raised spot usually makes it more obvious, not less. It cannot replace skincare: dry, unmoisturised skin will make even the best concealer look patchy and cracked by midday. And it cannot change your skin tone — a concealer that is far too light will look grey and ashy, while one that is far too dark will draw attention to exactly the area you wanted to hide. The Lipstick Queen guide to using concealer like a pro makes the same point: coverage should stay sheer to medium wherever skin creases, and full coverage only makes sense where discolouration shows through a lighter layer.
Think of concealer as a precision tool, not a mask. Used in thin layers, pressed in and blended at the edges, it becomes invisible — people notice that you look rested and even-toned, not that you are wearing makeup. That is the goal of this entire guide to how to apply concealer for beginners 2026, and every step below is built around it.
How to Apply Concealer for Beginners 2026: Choosing Your Shade and Undertone
The single biggest reason beginners struggle with how to apply concealer for beginners 2026 has nothing to do with technique — it is the wrong shade. Get the shade right and the application becomes easy; get it wrong and no amount of blending will save the result. The rule is simple, but it changes depending on the job: for blemishes, spots, and redness, choose a concealer that matches your foundation exactly — same depth, same undertone — so the product hides the spot, not itself. For under-eyes, go one shade lighter than your foundation to brighten and lift. One step is the limit: a shade two or three steps lighter turns grey and ashy instead of bright.
Undertone is the tie-breaker, and it matters more than most beginners realise. Your undertone is the subtle colour beneath your skin’s surface: warm (golden, peachy), cool (pink, rosy), or neutral (a mix). A warm concealer on cool skin — or the reverse — reads grey instead of natural, even when the depth looks right in the tube. The quickest way to check is your wrist: if your veins look greenish, you are probably warm; if they look blue or purple, you are probably cool; if you genuinely cannot tell, you are probably neutral. The Haute Atlas concealer guide agrees that undertone governs which concealer looks like skin, and that the guides from Byrdie and Allure on determining undertone are the right foundation for shade choice.
When you test a shade, never test it on the back of your hand — the skin there is a different colour from your face. Test it on your jawline or the side of your cheek, in daylight, and let it sit for a minute before judging, because some formulas oxidise and darken slightly as they dry. If you are choosing between two shades, pick the lighter one for under-eyes and the exact match for spots. And remember that your summer shade and your winter shade are often different: skin darkens in summer and lightens in winter, so many people need two concealers across the year, or a shade they can mix.
| Job | Shade rule | Undertone tip |
|---|---|---|
| Under-eye dark circles | One shade lighter than foundation | Peach or salmon corrector first for blue/purple darkness |
| Blemishes and spots | Exact match to foundation | Match depth AND undertone, or the spot shows through |
| Redness (nose, cheeks) | Exact match to foundation | Green corrector underneath for strong redness |
| Brightening / lifting | One shade lighter, centre of face only | Keep it to the inner under-eye and nose bridge |
| Colour correcting | Corrector shade, then concealer over it | Peach for dark circles, green for redness, yellow for dullness |
Colour correctors deserve a short explanation, because they confuse many beginners. A corrector is a tinted product that neutralises a colour before concealer goes over it: peach or salmon cancels blue and purple under-eye darkness, green cancels redness, and yellow cancels dullness. You do not need all three. Most beginners only ever need a peach corrector for dark circles, and only when the circles are strong enough that concealer alone cannot cover them. Apply the corrector first in a very thin layer, let it set, then apply your normal concealer over it. If you skip the corrector and pile on extra concealer instead, you get a thick, grey layer that creases — the exact problem correctors exist to prevent.
One more practical note for anyone learning how to apply concealer for beginners 2026 on a budget: you do not need five concealers. One medium-coverage liquid or cream in your exact foundation shade, plus one blending tool, covers every job in this guide. Add a second, lighter shade later only if your dark circles are strong — and even then, a peach corrector is often the cheaper and more effective second purchase.
Picking the Right Concealer Formula
Concealer comes in four main formulas — liquid, cream, stick, and powder — and the right one depends on your skin type and the job. Liquid is the best starting point for almost every beginner: it is the most forgiving, blends easily, suits most skin types, and works for under-eyes, spots, and redness alike. A lightweight liquid with a doe-foot applicator gives you control over how much product you use, which matters because using too much is the most common beginner mistake.
Cream concealer is thicker and gives more coverage, which makes it excellent for stubborn blemishes and scars — but it is also easier to over-apply, and on dry or mature skin it can settle into fine lines if you use too much or skip moisturiser. Stick concealer is the most portable and precise option for spot-concealing on the go, and it works well on normal to oily skin, but it can drag on dry skin and look heavy under the eyes. Powder concealer is a niche product: useful for setting other concealer or for very oily skin, but rarely the right first purchase for a beginner.
| Formula | Coverage | Best for | Watch out for |
|---|---|---|---|
| Liquid | Light to medium (buildable) | Under-eyes, everyday use, all skin types | Let it set 30 seconds before blending for more coverage |
| Cream | Medium to full | Stubborn blemishes, scars, strong darkness | Can crease if over-applied; needs moisturised skin |
| Stick | Medium to full | Quick spot cover, travel, oily skin | Can drag on dry skin; too heavy under eyes |
| Powder | Light | Setting concealer, very oily skin | Not enough coverage alone for dark circles |
Your skin type should drive the finish you choose. If your skin is dry, look for a hydrating formula with a satin or natural finish — a drying, matte concealer will emphasise texture and settle into fine lines. If your skin is oily, a lightweight matte or soft-matte liquid holds up longer and needs less powder to set. Combination skin usually does best with a satin-finish liquid that you set with powder only where you get shiny. The NYX guide to applying concealer correctly makes the same distinction: a hydrating formula for dry skin, and a lightweight buildable formula with a natural soft-matte finish for oily skin.
A final formula tip: test wear time, not just colour. A concealer that looks perfect in the shop mirror can fade, crease, or oxidise darker by lunchtime. When you try a new one as part of learning how to apply concealer for beginners 2026, wear it for a full day before deciding — check it at midday in daylight, and look specifically at the under-eye area and any spot you covered. If it has held without creasing or changing colour, you have found your formula.
Tools: Fingers, Sponge, or Brush?
You do not need an expensive brush set to learn how to apply concealer for beginners 2026 well. Three tools exist — fingers, sponge, and brush — and each wins in a different situation. The right choice is the one that gives you a thin, even layer with soft edges, because thick edges are what make concealer visible.
Your ring finger is the best tool for under-eyes, and it is free. The warmth of your fingertip melts cream and liquid concealer into the skin, and the ring finger applies the least pressure, which matters on the delicate under-eye area. Tap — never rub — the product in with gentle patting motions, and work from the inner corner outward. The downside is precision: fingers are not ideal for a tiny blemish, where they tend to spread product over too wide an area.
A damp sponge is the safest default for most jobs. A damp beauty sponge presses product into the skin and leaves a sheer, skin-like layer, which is why makeup artists reach for it so often. Damp is the key word: run the sponge under water, squeeze it out until it is just damp, and then bounce it gently over the concealer. A dry sponge absorbs too much product and leaves a patchy finish. Use the pointed end for under-eyes and the rounded end for larger areas. The sponge is also the most forgiving tool for beginners, because it sheers out extra product instead of leaving streaks.
A small brush gives the most precision, which is exactly what a blemish needs. Use a small, flat concealer brush or a fluffy blending brush to place product directly onto the spot, press the edges into the surrounding skin, and then let the layer set before anything touches it. Brushes are also the best choice when you need to build coverage in thin layers, because they deposit product exactly where you put it. The trade-off is that a brush can leave visible strokes if you drag it instead of tapping, so always finish with a tap or a quick bounce of a damp sponge over the edges.
Whatever tool you choose, keep it clean. A dirty sponge or brush carries old product, oil, and bacteria onto your face, which can cause breakouts and make concealer apply unevenly. Wash brushes at least once a week with gentle soap, and replace a sponge every one to three months — sooner if it starts to tear or smell. Clean tools are not a luxury step in how to apply concealer for beginners 2026; they are part of why the same concealer looks flawless on one person and patchy on another.
How to Apply Concealer for Beginners 2026: The 7 Best Steps
Here is the full routine for how to apply concealer for beginners 2026, in the order that works. The whole thing takes about five minutes once you have practised it twice, and every step exists for a reason — skipping one is usually why the result looks off. Work in thin layers throughout: you can always add a little more, but you cannot easily take away too much.
Step 1: Prep Your Skin
Start with clean, moisturised skin. Concealer grips best on a hydrated base, so apply your usual moisturiser and let it absorb fully — at least a minute — before any makeup goes on. If you use eye cream, apply a light layer under the eyes and let that absorb too; it fills in fine lines so concealer has a smooth surface instead of settling into them. For daytime, sunscreen goes on before makeup as well. Then apply a long-lasting primer if you use one, focusing on the areas where makeup tends to fade first. Skipping prep is the number one reason concealer looks dry and patchy by midday, so this unglamorous step is the one that matters most.
Step 2: Apply Foundation First
For most full-coverage looks, apply foundation before concealer. The foundation evens out your overall skin tone first, which means you need far less concealer afterwards — often half as much. That is the whole point: concealer is for what is left, not for the whole face. There are two exceptions. If you are doing a sheer, light base, you can use concealer first and skip foundation on the areas that do not need it. And if you are using a heavy corrector or a thick camouflage concealer for a scar, apply that first, then foundation over it, so the boundary blends away. For everyone else learning how to apply concealer for beginners 2026: foundation first, then concealer, then the rest of your routine.
Step 3: Cover the Under-Eyes
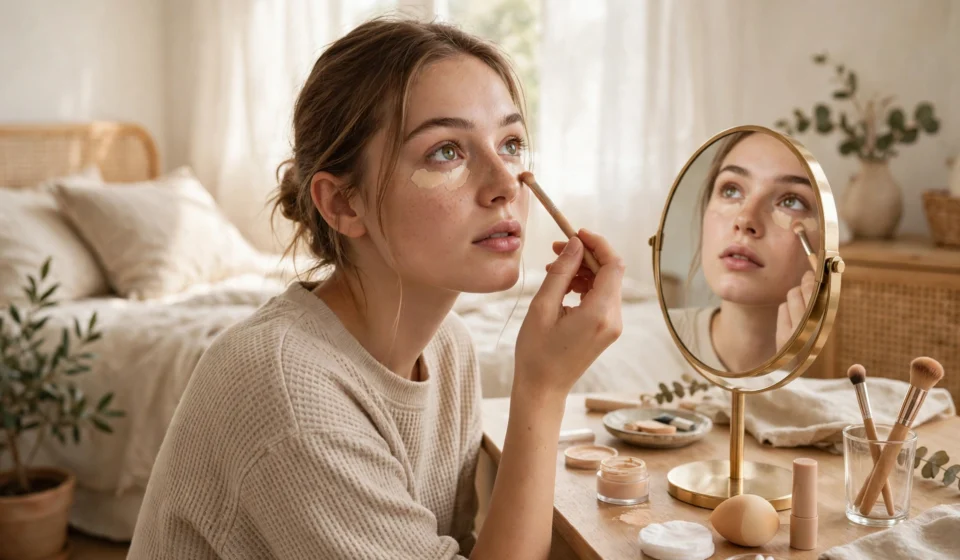
Dark circles are the most common reason people learn how to apply concealer for beginners 2026, so take your time here. Apply small dots of concealer under each eye — one at the inner corner where darkness is usually strongest, one in the centre, and a small one below the outer corner, away from the lower lash line. Do not paint a big crescent across the whole under-eye: that is far too much product, and it is what causes creasing. Let the dots sit for about 30 seconds so the formula thickens slightly and gives more coverage, then tap outward with your ring finger, a damp sponge, or a small brush, pressing rather than dragging. Keep the product out of the fine-line crease where it gathers, and blend the outer edge until it disappears into your foundation. If you have blue or purple darkness, correct first with a thin layer of peach corrector, then apply concealer over it — the MakeupTutorials 5-step guide gives the same placement advice and the same warning about thin layers.
Step 4: Conceal Blemishes and Spots
Spot concealing is a targeted job, and precision is everything. Apply a tiny amount of concealer directly onto the blemish with a small brush or your fingertip — a dot, not a swipe. Let it sit for a few seconds, then gently tap around the edges to blend them into the surrounding skin, without rubbing or dragging across the centre of the spot, which lifts the pigment straight off. Avoid the temptation to add a second thick layer immediately; if the spot still shows, wait for the first layer to set, then add a thin second layer only on the spot itself. The MakeupAdda beginner guide gives the same steps — tiny amount, let it sit, tap the edges, never drag — and adds a useful warning: never apply concealer to a broken or irritated spot with a dirty tool, because that is how a small blemish becomes a bigger problem.
Step 5: Cover Redness Around the Nose and Mouth
Redness around the nose, chin, and mouth is often the last thing beginners notice and the first thing other people see in photos. Use your exact-match shade here, not a lighter one — a lighter shade on redness turns pink and draws more attention. Apply a small amount with a brush or fingertip, blend gently with a brush or sponge until it melts into the skin, and set it lightly. If the redness is strong, a thin layer of green corrector underneath neutralises it before concealer goes over, but for most people the exact-match concealer alone is enough. This step takes twenty seconds and makes a surprising difference to how even your skin looks in daylight — one of the quickest wins in how to apply concealer for beginners 2026.
Step 6: Blend Properly
Blending is the key to natural-looking makeup, and it is where most beginners either stop too early or overdo it. The rule is simple: tap, never rub. Use tapping motions with a damp sponge, a brush, or clean fingertips, and blend the edges of every patch of concealer outward until the edge disappears. Check your work in daylight, not just bathroom light — step to a window and look straight ahead, then turn your face slightly to each side. If you can see where the concealer starts and stops, keep blending the edge, not the centre. A final bounce of the damp sponge over the whole area melts everything together and removes any excess sitting on the surface.
Step 7: Set With Powder
To keep concealer from moving or creasing, set it with powder — lightly. Use a small fluffy brush and dust a tiny amount of translucent powder over the concealed areas, focusing especially on the under-eye area, where creases form fastest. The powder locks the cream in place and absorbs the oil that would otherwise break it down by afternoon. Do not press hard or use a heavy hand: too much powder looks dry and cakey, which is the opposite of what you want. One light dusting is enough. If your skin is very dry, you can skip powder on the cheeks and set only the under-eyes and the T-zone. Finish with a setting spray if you use one — it melts the powder into the skin and takes away any powdery look.
How to Stop Concealer From Creasing
Creasing is the most frustrating concealer problem, and it is almost always a layer problem: too much product gathering in the fine lines under the eyes, where the skin moves all day. A thin layer that moves with the skin always looks better than a thick one that cracks by lunch. The fixes are all in the steps above, but they are worth gathering in one place for anyone following how to apply concealer for beginners 2026.
First, use less product than you think you need. Most beginners use three times too much under the eyes. Three small dots are enough; a painted crescent is not. Second, let the concealer set for 30 seconds before blending — it thickens slightly and stays where you put it. Third, set with powder immediately after blending, while the concealer is still slightly tacky, so the powder grips it. Fourth, moisturise and use eye cream first: dry skin under the eyes is the fastest route to creasing, because the product has nothing smooth to sit on. And fifth, avoid layering cream products on top of each other in the same spot — cream blush or cream bronzer over unset concealer will drag it into lines. If you do all five and still see creasing, your formula is probably too thick or too dry for your skin: switch to a lighter, more hydrating liquid and test it for a full day before judging.
How to Apply Concealer for Beginners 2026: Common Mistakes to Avoid
Most bad concealer days come from the same handful of mistakes, and every one of them is easy to fix once you know it — which is why this section of how to apply concealer for beginners 2026 matters as much as the steps themselves. The first is choosing a shade that is far too light. A concealer two or three shades lighter than your skin does not brighten — it turns grey, looks ashy in photos, and highlights the exact area you wanted to hide. Stick to one shade lighter for under-eyes and an exact match everywhere else, and test shades on your jawline in daylight.
The second mistake is applying concealer before foundation on a full-coverage look, which forces you to use far more product than you need, because the foundation then has to go over it and move it around. Foundation first, concealer second — except for heavy correction, where the corrector goes first. The third mistake is rubbing instead of tapping. Rubbing drags the product off the spot you are trying to cover and spreads it over too wide an area; tapping presses it in and keeps it where you put it.
The fourth mistake is skipping skincare and primer, then blaming the concealer when it looks patchy by midday. Concealer cannot fix dry, flaky, or unprimed skin — it can only sit on top of it. The fifth is using the same heavy formula everywhere: a thick cream that works on a blemish will crease under the eyes, and a sheer liquid that works under the eyes will not cover a stubborn spot. Match the formula to the job. And the sixth mistake is never setting it: unset concealer migrates, fades, and creases within hours, while one light dusting of translucent powder keeps it in place all day. Avoid these six, and your how to apply concealer for beginners 2026 routine will already look better than most people’s.
How to Make Concealer Last All Day in Winter
Winter is the hardest season for concealer: cold air dries the skin, indoor heating strips moisture, and the product that lasted all summer suddenly creases and fades by lunchtime. The fix is mostly about prep. Moisturise more generously than you do in summer, and let the moisturiser absorb fully before makeup. A hydrating primer helps the concealer grip instead of sitting on dry patches, and a hydrating liquid formula will outperform a matte one in cold weather — save the matte concealer for summer.
Apply in the same thin layers as always — the core habit of how to apply concealer for beginners 2026 — but set more carefully: powder only where you need it (under-eyes and T-zone), and finish with a setting spray, which melts the powder into the skin and stops the dry, powdery look winter makeup so often gets. Carry your concealer for one small touch-up if you will be out all day — a single dot tapped over a faded spot is all it takes. For the full winter routine, our guide to keeping makeup fresh all day in winter 2026 covers the same layering method for your whole face, and it pairs directly with the steps above. And because lips dry out fastest in winter, keep them in shape too — our guide to making lipstick last all day 2026 uses the same thin-layer principle, and if your lipstick feathers in the cold, our lipstick bleeding fix shows how to stop it.
Frequently Asked Questions
Should concealer go on before or after foundation?
After foundation for most full-coverage looks. The foundation evens your skin tone first, so you use far less concealer afterwards. The exceptions are sheer bases, where you can use concealer first and skip foundation, and heavy colour correction, where the corrector goes on first and foundation goes over it. This is the single most useful rule in how to apply concealer for beginners 2026, because getting the order right cuts the amount of product you need in half.
What shade of concealer should beginners buy first?
One medium-coverage liquid in your exact foundation shade. It covers blemishes, redness, and most under-eye darkness on its own. Add a second shade one step lighter later, only for under-eye brightening — or a peach corrector if your dark circles are strong. Test shades on your jawline in daylight, not on the back of your hand.
Why does my concealer crease under my eyes?
Too much product, or product applied to dry skin. Use three small dots instead of a painted crescent, let the concealer set for 30 seconds before blending, moisturise and use eye cream first, and set with a light dusting of translucent powder immediately after blending. If it still creases, your formula is probably too thick or too dry — switch to a lighter, hydrating liquid.
Can I apply concealer with my fingers?
Yes — your ring finger is actually the best tool for under-eyes, because its warmth melts the product into the skin and it applies the least pressure. Tap gently, never rub. Use a damp sponge for larger areas and a small brush for precise spot work. Keep whatever tool you use clean, and wash brushes weekly.
Do I need a colour corrector as a beginner?
Usually not. Most beginners only ever need a peach corrector, and only when dark circles are strong enough that concealer alone cannot cover them. Green corrector helps strong redness, and yellow helps dullness, but if your circles and redness are mild, a good exact-match concealer is enough. Do not buy all three before you have tried one concealer properly.
How do I stop concealer from looking cakey?
Use less product in thinner layers, blend the edges until they disappear, moisturise and prime first, and set with a light dusting of powder instead of a heavy layer. Cakey concealer is almost always too much product on unprepared skin — fix the prep and the amount, and the same concealer will look completely different. That is the real lesson of how to apply concealer for beginners 2026.
Concealer is a small product with an outsized effect: a few thin, well-placed layers can make you look rested, even-toned, and polished in five minutes, while the wrong shade or too much product does the opposite. Start with one medium-coverage liquid in your exact shade, follow the seven steps in how to apply concealer for beginners 2026, and practise the routine twice — by the third time, it will feel automatic. For the rest of your routine, keep the same thin-layer habit everywhere: it is what makes lipstick last, stops feathering, and keeps your whole face fresh until evening.