
Learning how to fix lipstick bleeding is the difference between lipstick that photographs beautifully at 9 AM and a feathered mess by lunch. You know the look: thin little streaks of color creeping past your lip line into the fine lines around your mouth, until a sharp red lip looks like a watercolor painting left out in the rain. Makeup artists call it bleeding or feathering, and it is one of the most common lip complaints there is — especially now that 2026’s glossiest lip trends are back. According to Pinterest’s 2026 Beauty Trend Report, searches for metallic lips are up 52% and frosted Y2K-style lips are surging again — and as every pro will tell you, the shinier the formula, the faster it travels. The good news: you do not need new lips, expensive treatments, or a single “miracle” product. Below is the complete 2026 guide to how to fix lipstick bleeding — what causes it, the 7-step routine that prevents it, how to repair it midday without starting over, and the formula choices that make the whole job easier.
Table of Contents
How to Fix Lipstick Bleeding: What It Actually Is
Bleeding is color and oil traveling past the lip line — most often down the vertical fine lines around the mouth, which deepen with age. As the team at Lipstick Queen explains in their pro guide, feathering is the same migration (the name comes from how the color spreads in thin, wispy lines like the barbs of a feather), and most makeup artists treat stopping one as stopping the other.
What bleeding is NOT: smudging. Smudging is color rubbing off onto teeth, cups, and masks — a transfer problem that a lip-line barrier will not fix. Bleeding is migration through the skin’s own texture, which is why the fixes are completely different. Also worth knowing: no lipstick is completely feather-proof. The goal is management, not magic — and with the right routine, that management becomes nearly invisible.
So when we talk about how to fix lipstick bleeding, we are really talking about two jobs: building a barrier before the color goes on, and repairing the edge if the color still escapes.
Why Does Lipstick Bleed? 4 Real Causes
The first step in how to fix lipstick bleeding is diagnosing your own pattern, because the fix depends on the cause. Hold a mirror close and look at how the color is traveling:
1. Fine lines around the mouth. Thin vertical streaks running upward from the lip line mean fine lines are carrying the color. These come from repeated lip pursing, collagen loss with age, sun exposure, smoking, and dehydration. Mount Sinai dermatologist Joshua Zeichner has explained that as collagen diminishes, the Cupid’s bow and vermilion border lose their distinction — the lip edge literally becomes a softer, less defined border, which is why lipstick bleeds more with age. You cannot erase these lines with makeup, but you can manage them.
2. Excess oil along the lip line. A soft, fuzzy halo of color around the whole mouth — rather than streaks — points to oil breaking the formula down. Revlon’s lip care guidance lists excess oil along the lip line as the usual culprit on younger skin. And the lipstick itself carries oil: castor oil can reach 50% of a lipstick formula, so even a “dry-feeling” creamy stick has plenty of mobile liquid inside it. Skin oil breaks the formula down from the outside in, and warmth makes oils flow faster — a shade that holds in a cool room can start moving in summer heat.
3. The wrong formula. The glossier the product, the higher the bleed risk. Matte and satin finishes bleed least; glossy and balm-like formulas bleed most because they stay mobile on the lip surface. This is the cruel irony of 2026’s lip trends: the frosted, metallic, glassy finishes everyone wants are exactly the textures that travel. (More on picking formulas below.)
4. Too much balm underneath. Over-moisturizing without blotting is one of the most common causes of bleeding. Balm put on right before lipstick leaves a slick layer that color slips on — put it on earlier and blot, and the lips stay soft while the surface gives lipstick something to grip.
See streaks AND a halo? You get both causes, and you stack the fixes: barrier first, powder last.
How to Fix Lipstick Bleeding: The 7-Step Prevention Routine
This is the order professional makeup artists use backstage, where a clean lip has to survive talking, eating, drinking, and hot stage lights for hours. Every step has a job; skip one and the whole chain gets weaker.
Step 1: Exfoliate — but not right before
Dry flakes make lipstick catch on rough spots and slide into lines. Gently exfoliate with a soft lip scrub or a damp cloth a few times a week — never scrub cracked lips, and do not exfoliate immediately before application just to “erase texture,” which can irritate the skin and make things worse. If your lips are chronically dry, our winter lip care routine 2026 builds the exact smooth base this technique needs.
Step 2: Hydrate hours ahead, then blot
Hydration timing matters more than the product. Apply lip balm through the day or the night before, then blot until the lip surface feels matte — not slick — before any color goes on. Skip irritants like camphor, menthol, and eucalyptus, which dry lips out over time.
Step 3: Build a barrier at the border
A thin coat of lip primer over the whole lip and its edges, left to dry, seals the perimeter. A sheer layer of concealer or foundation worked around the border does the same job and is especially effective over deeper fine lines. In a pinch, a dab of waterproof eyeshadow primer around the lip edge blocks migrating oils. These barriers stack — use as many as you need.
Step 4: Line with a firm, waxy pencil — and fill the whole lip
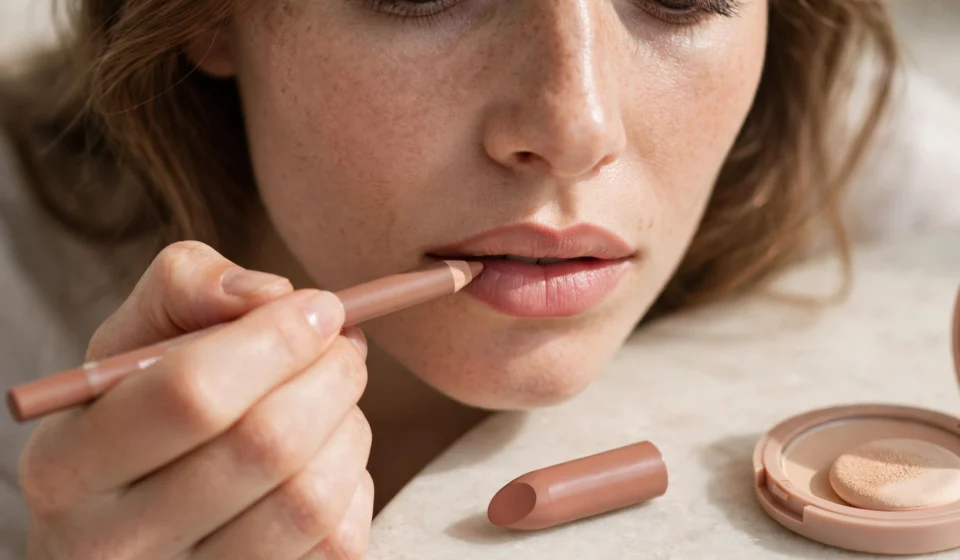
This is the step that matters most. Use a firm, waxy liner (soft, creamy pencils slide), fill the ENTIRE lip with it — not just the outline — and then press a thin veil of translucent powder over the liner with a fingertip or small brush before any lipstick goes on. The two most common reasons liner fails: outlining only while leaving the center bare, and skipping the powder set, which lets the liner shift under the lipstick. For shade, match your natural lip tone rather than the lipstick — it creates an invisible barrier that fades gracefully instead of leaving a stenciled ring as the color wears off. (The one exception: with true red lipstick, use a red liner.) As RMS Beauty founder and legendary makeup artist Rose-Marie Swift teaches in her feathering guide, the liner’s firmer, drier texture is exactly what creates the barrier color cannot easily cross.
Step 5: Apply lipstick in thin layers, from the center out
Work from the center of the lips outward with a lip brush for tight edge control — a brush beats the bullet for precision. One thin layer, then blot.
Step 6: Blot between layers
Press a single-ply tissue between the lips after each coat. This removes the excess surface product most likely to migrate while leaving pigment anchored underneath. Rose-Marie Swift’s preferred method: fold a tissue in half, hold it across the lips, and rub your lips over the top of the tissue — it leaves a soft, voluptuous finish with no harsh lines.
Step 7: Set with powder — twice, in two places
Here is where the pros split, and the smart move is to use both methods: first, roll a translucent-powder-dusted cotton swab just OUTSIDE the lip line before color, which builds the outer wall; then, after the lipstick is on, hold a tissue over the lips and dust translucent powder THROUGH it with a fluffy brush, which locks the color with only the lightest veil of powder. Together they solve the two different problems — border migration and surface transfer.
Follow this sequence and you have done everything technique can do. That is how to fix lipstick bleeding the way the pros do it: barrier first, liner second, powder third, color in thin layers with a blot after each.
How to Fix Lipstick Bleeding That’s Already Happened
It is 2 PM, you catch your reflection, and there are little red tributaries heading north of your lip line. Do not wipe the whole lip off — knowing how to fix lipstick bleeding midday is a separate, faster skill:
1. Lift the stray color first. Run a clean cotton swab — lightly dampened with makeup remover if needed — along the outside of the lip line where the color has spread. Get the skin clean before you add anything else, or you are just painting over the stain.
2. Rebuild the barrier. With a small brush, tap a sheer layer of concealer or foundation along the border. This covers the stained skin AND acts as a fresh wall against more migration.
3. Powder the perimeter. Roll a swab dipped in translucent powder just outside the lip line. This is your new outer defense.
4. Touch up the center only. Add color to the center of the lips and stop short of the edge. The less product sitting near the border, the less there is to travel.
For the handbag kit: cotton swabs, a small flat brush, a mini concealer, travel-size translucent powder, and single-ply tissues. With those five things, any bleed is a two-minute fix.
How to Fix Lipstick Bleeding Without Any Lip Liner
No liner in your bag? A liner makes the job easier, but you can still keep color in place without one. Press a little translucent powder or concealer around the edge of the lips to build the barrier, then apply lipstick with a lip brush or your fingertip so you can keep it neatly inside your natural line. Blot between thin layers, skip heavy balm right before applying, and choose a formula that sets rather than slides. A clear liner — one pencil that works under every shade — is the minimalist’s long-term answer, though it cannot reshape the lip the way a pigmented liner can.
Which Lipstick Formulas Bleed Least (and Most)
If technique is the lock, formula is the key — and the fastest shortcut in how to fix lipstick bleeding is simply wearing a formula that does not want to travel:
| Formula | Bleed Risk | Why |
|---|---|---|
| Liquid matte | Low | Sets to a dry finish instead of staying fluid; the best bet for all-day color without bleeding |
| Matte or satin bullet | Low to moderate | Less slip than cream; the everyday sweet spot |
| Cream | Moderate to high | The oil-rich base keeps moving; needs the full liner-fill-and-blot routine |
| Gloss or balm-like | Highest | Stays fluid on the lip surface; keep to the center only, over a set base |
The rule of thumb: the shinier it looks in the tube, the more it will move on the face. And one caution — an ultra-matte formula on dry, flaking lips can crack and flake, which also leads to feathering. Comfort and control have to be balanced, which is why a long-wearing satin is the compromise most artists reach for.
5 Mistakes That Make Lipstick Bleeding Worse
1. Outlining only, center left bare. The single most common liner failure — color slides right over the outline, because the center stays slick.
2. Using a soft, creamy pencil. It does not hold an edge the way a firm, waxy one does — the barrier needs structure.
3. Skipping the powder set. Without it, the liner shifts the moment lipstick is pressed on top, and the whole border goes with it.
4. Balm right before lipstick. A slick base is a slip-n-slide for pigment. Hydrate early, blot before color.
5. One thick layer instead of thin blotted ones. A barrier holds a fixed amount of product — anything past that spills over it. And a glossy topcoat dragged all the way to the edge undoes everything; keep gloss centered.
How to Fix Lipstick Bleeding: FAQs
Can I stop my red lipstick from bleeding?
Yes — red is actually one of the most manageable bold shades, because you can use the matched-liner exception: line and fill with a red liner, set it with powder, and layer the lipstick thinly. The matched liner sharpens the contour, though it will show as an outline as the lipstick fades, so carry the liner for touch-ups.
Does lipstick bleed more as you get older?
It often does — the skin around the mouth loses collagen, fine lines deepen, and the natural lip border softens, all of which give color more places to travel. But it is not inevitable: a natural-toned liner, a light layer of powder at the lip line, less slippery formulas, and daily sun protection on the lips go a long way.
Why does my lipstick bleed even when I use lip liner?
Almost always one of these: only lining the edge without filling the lips, a liner that is too creamy, too much balm underneath, a very slick lipstick, or skipping the powder step that sets the liner. Fix the step you skipped and the liner starts working.
Is feathering the same as smudging?
No. Feathering (bleeding) is color migrating into the fine lines and skin around your lips. Smudging is lipstick transferring onto teeth, cups, or masks. A lip-line barrier fixes the first; it does nothing for the second.
How do I wear gloss without it bleeding everywhere?
Line and fill the lips first, set the liner with powder, then keep the gloss strictly to the center of the lips — never dragged to the edge. The center gloss gives the juicy highlight while the set base holds the border.
The Bottom Line
The real secret to how to fix lipstick bleeding is not one product — it is the sequence: prep the lips early, blot away the slick, build a primer or concealer barrier, fill the whole lip with a firm waxy liner, set it with powder, then layer lipstick thinly from the center out with a blot between coats. Do that, and even 2026’s glossiest metallic shades stay exactly where you put them. And if a little color still escapes by afternoon, you now know the two-minute repair: swab it clean, rebuild the barrier, powder the perimeter, touch up the center. For the lip-prep side of the routine, our winter lip care routine 2026 keeps the canvas smooth all season — and for the full technical deep-dives every claim here was checked against, see Lipstick Queen’s pro guide to keeping lipstick from bleeding and RMS Beauty’s feathering guide from legendary makeup artist Rose-Marie Swift.