
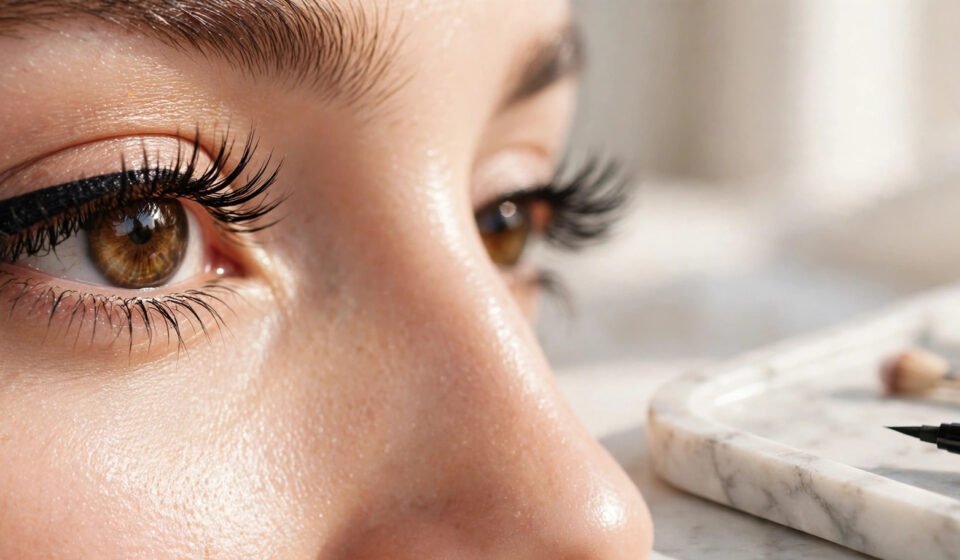

What You Need Before You Learn How to Do Cat Eye
Before you pick up the liner, let us set you up for success. Learning how to do cat eye is 80% preparation and 20% drawing — beginners who skip the prep almost always end up frustrated. Here is your starter kit.
A felt-tip liquid liner pen is the best tool for beginners learning how to do cat eye. It works like a marker, giving you maximum control with minimum pressure. Look for one with a firm, fine tip — floppy brush tips are harder to steer when your hand is still learning. Waterproof formulas are worth it because they resist smudging while you practice.
A gel liner with an angled brush is your backup option and your best friend for fixes. Gel is more forgiving than liquid because you can stamp and build it slowly, and an angled brush lets you carve sharp wing edges with concealer-level precision.
You will also want oil-free makeup remover or micellar water plus pointed cotton swabs for cleanup, an eyeshadow primer so the liner grips instead of sliding, and concealer for sharpening the wing’s lower edge. Optional but helpful: a small piece of tape or a business card to use as a stencil while you learn the angle.
Finally, set up properly: sit at a table with your elbow planted firmly, hold a magnifying mirror at eye level, and work in bright natural light. Shaky hands are the enemy of a clean wing, and good lighting plus a stable arm eliminate most of the struggle before you even start.
How to Do Cat Eye: Step-by-Step Tutorial for Beginners
Here is the exact method makeup artists teach first-timers. Go slowly — speed comes with practice, but clean technique comes from patience.
Step 1: Prime Your Lids
Apply a thin layer of eyeshadow primer from lash line to brow bone and let it set for 30 seconds. Primer does two critical jobs: it gives the liner something to grip so it does not skip or smudge, and it prevents the oils on your lids from breaking down the wing by midday. On bare, unprimed lids even the best liner will feather and fade — this step is non-negotiable.
Step 2: Map the Wing Angle
Look straight into the mirror with your eyes open and relaxed — never draw a wing with your eye closed or stretched, because the shape will warp when you open it. Imagine a line extending from your lower lash line upward toward the tail of your eyebrow. This is your wing guideline. For a classic cat eye, the wing should flick outward and slightly upward, following the natural upward angle of your lower lid. Draw a tiny dot where you want the wing tip to end — about 3–5mm past your outer corner for a subtle everyday wing.
Step 3: Draw the Wing Outline
With your felt-tip pen, draw a thin line from that dot back down to your outer lash line, creating a small triangle. Keep the line thin at first — you can always thicken it, but you cannot easily thin it. Rest your pinky finger on your cheek for stability and draw in short, connecting strokes rather than one long swoop. Beginners get cleaner lines with 3–4 short strokes than with a single shaky drag.
Step 4: Connect the Wing to Your Lash Line
Now draw a thin line along your upper lash line from the inner corner outward, meeting the base of your wing triangle. Stay as close to the lashes as possible — the goal is to fill the gap between lashes so there is no skin showing through, which is what makes liner look polished versus amateur. If your line wobbles, do not panic; you will clean it up in Step 6.
Step 5: Fill In the Triangle
Color in the wing triangle you outlined, keeping the outer edge crisp. Use the side of the pen tip for filling rather than the point — it deposits more product with less pressure and keeps the edge sharp. Check both eyes in the mirror and compare wing length and angle. It is completely normal for your dominant-hand eye to look better; just match the weaker side to it rather than trying to make both perfect from scratch.
Step 6: Clean Up and Sharpen
Here is the professional secret: nobody’s first draft is perfect, and pros do not expect it to be. Dip a pointed cotton swab in micellar water and sharpen the lower edge of each wing with gentle upward strokes. Then take a small flat brush with a touch of concealer and carve a clean line underneath the wing. This cleanup step is what transforms a decent wing into a razor-sharp cat eye — it erases every wobble.
Step 7: Finish with Mascara
Curl your lashes and apply two coats of mascara, wiggling the wand at the roots. Mascara blends your natural lashes into the liner and completes the cat eye effect — without it, the wing can look disconnected and harsh. For extra drama, add mascara to the lower lashes too, or press a half-strip of false lashes onto the outer corners.
Congratulations — you now know how to do cat eye! The first attempt takes most beginners 15–20 minutes. By your fifth try, you will be under five minutes. And once you have the basic wing down, it pairs beautifully with a bold lip for party season — see our New Year makeup looks for full-face inspiration.
How to Do Cat Eye on Different Eye Shapes
The classic tutorial above assumes an average almond eye. If your eyes are shaped differently, small adjustments make a huge difference in how to do cat eye on your face.
Hooded Eyes
When learning how to do cat eye on hooded eyes, the biggest mistake is drawing the wing with your eyes closed — the hood hides or distorts it when you open them. Always map the wing with eyes open, and draw the flick slightly straighter outward rather than steeply upward so it stays visible. Keep the liner on the lash line thin, because thick liner disappears under the hood. A waterproof formula is essential here since the hood constantly touches the liner.
Round Eyes
For round eyes, extend the wing further outward (almost horizontal) rather than upward — this elongates the eye and creates that sultry cat-eye effect. Keep the inner-corner liner minimal and focus thickness on the outer third. This technique visually stretches round eyes into a more almond shape.
Almond Eyes
Almond eyes are the easiest canvas for learning how to do cat eye — the natural eye shape already lifts at the corners. Follow the classic tutorial as written, and feel free to experiment with thicker wings and dramatic flicks, because almond eyes can carry bold liner without looking heavy.
Monolids and Deep-Set Eyes
For monolids, draw a thicker line and a bolder wing than you think you need — fine liner gets lost when the eye is open. You can also try the “puppy liner” variation (flicking slightly downward) for a softer look. For deep-set eyes, keep the wing short and precise; long dramatic wings can make deep-set eyes look heavier. Shimmery liner or a metallic wing is a gorgeous alternative that catches light beautifully on deep-set eyes.
Common Mistakes When Learning How to Do Cat Eye (and Easy Fixes)
Every beginner makes these mistakes — here is how to fix each one fast.
- Uneven wings. The most common complaint. Fix: draw both wings’ guideline dots first and compare before committing. Use the tape trick — place small pieces of tape at identical angles under each outer corner as a stencil until your muscle memory develops.
- Wings that are too thick or too long. Beginners almost always overshoot. Fix: start smaller than you want. You can thicken a thin wing in seconds, but slimming a thick one means starting over. When in doubt, go shorter.
- Stretching the eye while drawing. Pulling the outer corner taut seems helpful, but when you release, the wing crinkles and warps. Fix: keep eyes relaxed and open, and steady your hand by resting your elbow on a table instead.
- Skipping primer. Without primer, liner migrates, fades, and transfers to the upper lid within hours — especially on oily lids. Fix: always prime, and set the primer with a touch of translucent powder or nude eyeshadow for extra grip.
- Giving up after one bad eye. Nobody’s first cat eye is symmetrical. Fix: finish both eyes, then clean up with micellar water and concealer. The cleanup step rescues about 90% of “failed” wings — judge your work only after Step 6.
- Using a dried-out pen. If your liner skips and drags, it is probably old, not your technique. Fix: store liner pens tip-down, and replace them every 3–6 months. Test on your hand first — if it is not pitch black and smooth, toss it.
FAQs About How to Do Cat Eye
What is the easiest eyeliner for beginners learning how to do cat eye?
A felt-tip liquid liner pen. It handles like a marker, gives precise control, and does not require brush skills. Avoid brush-tip liquid liners and kohl pencils for your first attempts — pencils smudge too easily for crisp wings.
How long does it take to learn how to do cat eye?
Most beginners get a wearable wing within 3–5 practice sessions. Daily practice for one week is enough for most people to do both eyes in under five minutes. Be patient with your non-dominant side — it always lags behind.
Can I do a cat eye without liquid liner?
Yes. Gel liner with an angled brush, or even dark eyeshadow applied wet with an angled brush, can create a softer winged look. These are actually more forgiving for total beginners, though the edge will never be as razor-sharp as liquid.
Why does my wing look good with eyes closed but weird with eyes open?
You drew it with your eye closed or stretched. Always map and draw the wing with eyes open and relaxed, looking straight into the mirror — this is the golden rule of how to do cat eye correctly.
Final Thoughts
Learning how to do cat eye is one of those makeup skills that feels impossible until suddenly it clicks — and then you will wonder why it ever seemed hard. Start with a felt-tip pen, prime your lids, map with eyes open, and let the cleanup step do the heavy lifting. Practice a few times this week, and the perfect winged liner will be yours. Once you have mastered the classic black cat eye, try brown liner for daytime, a double wing for nights out, or pair it with a red lip using our winter lip care routine to keep lips smooth under bold color. Happy lining!